Showing posts with label Recipes. Show all posts

Thursday, May 13, 2010

Not Really Tuesday: Cookies 'N McCreams

Hello, hello! I know, you guys are all surprised I'm back so soon, right? Don't lie, you know you are. Anyway, onto the recipe. A huge huge thank you to @Britmum2070 on Twitter for the name of this week's baked good. The runner up for a name?

"Abby's All-American Cookies 'N Cream cupcakes-- So Easy A Goth Can Do It!" courtesy of @jetgibbs. You ladies are the best. It was difficult to choose a name, but being that it's @CatherineYetive's birthday and she's a huge McGee fan, I went with the McGee name.

Happy birthday Catherine!

Cookies 'N McCreams
Ingredients:
1 package white cake mix
1 1/4 cups of water
1/4 cups of canola oil
3 egg whites
1 cup (approximately 9 cookies) coarsely crushed Oreo cookies
1 can of vanilla frosting
Additional crushed cookies for topping
Directions:
1.) Preheat the oven to 350 degrees.
2.) Line cupcake tin with paper liners.
3.) In a large bowl, mix together cake mix, water, oil and egg whites until blended.
4.) Fold in crushed oreos.
5.) Fill muffin tins a little over halfway full, bake for approximately 18-22 minutes.
6.) Allow cupcakes to cool, frost with vanilla frosting and sprinkle with cookie crumbs.
Notes: This recipe was super easy to make and according to my mom, they're yummy cupcakes. Still haven't tested it on my boys yet, but that's coming soon :)
These cupcakes, as previously stated, were probably some of the easiest I've ever made. I'll definitely make them again.

Wednesday, December 23, 2009

New Recipe Wednesday: New Recipes

Fear not, faithful readers: I managed to survive the "winter wallop" (teehee), despite the fact that I had to work the two nights that it was the worst. A huge thank-you to my guinea pigs officers, because without them, there's no way I would have gotten out of the house!

I'm well aware that I missed Tuesday (again), but that's because I've pretty much been baking all week. I've got two new recipes for this post.

Peanut Butter Cookies
Ingredients:
3/4 cups of crunchy peanut butter
1/2 cup of shortening
1 1/4 cups of light brown sugar
3 tablespoons of milk
1 tablespoon of vanilla extract
1 egg
1 3/4 cups of flour
3/4 teaspoons of salt
3/4 teaspoons of baking soda
Directions:
1.) Heat oven to 375 degrees.
2.) Combine peanut butter, shortening, light brown sugar, milk and vanilla in a large bowl. Beat until well blended.
3.) In another bowl, combine flour, salt and baking soda.
4.) Add dry ingredients to the creamed mixture, mixing until well blended.
5.) Roll into 1 inch balls and drop onto pan.
6.) Bake for 7-9 minutes.
Notes: I've always been kind of grossed out by shortening (just because it looks so icky), but these cookies tasted pretty good. If you decide to make the fork criss-cross pattern ontop of the cookies, I found that dipping the fork into sugar helps to keep it from sticking. Also, don't be afraid if the cookies don't necessarily look all the way done when they're taken out. After letting them sit, they'll be just fine. This recipe makes about three dozen cookies.


Macadamia Cookies
Ingredients:
1/2 cup of butter
2/3 cups of sugar
1 egg
1 teaspoon of vanilla extract
1 1/8 cups of flour
1/2 teaspoon of baking soda
1 3.5 oz jar of macadamia nuts, chopped
1 cup of white chocolate chips
Directions:
1.) Preheat the oven to 350 degrees.
2.) In a large bowl, cream the butter and sugar.
3.) Beat in the egg and vanilla.
4.) In another bowl, combine the flour and baking soda.
5.) Add dry mixture to creamed mixture, beat well.
6.) Stir in nuts and chips.
7.) Bake for 10-12 minutes.
Notes: This recipe makes delicious cookies. I'm usually not a fan of macadamia nut cookies, but I'd definitely make (and eat) these again.


Christmas Cookie Checklist
A Squad
B Squad
C Squad Finished
D Squad
E Squad Finished


My mountain of cookies, not including the macadamia nuts

Saturday, December 19, 2009

New Recipe Friday: Chewy Peanut Butter Brownies

Okay, so it's technically Saturday, though I made these before I came in to work, so it was still Friday when they were being baked! I'm not quite sure what made me decide to make these damn brownies instead of catching up on my sleep, but I never claimed to be sane.

Chewy Peanut Butter Brownies
Ingredients:
3/4 cups of butter, melted
3/4 cups of creamy peanut butter
1 3/4 cups of sugar
2 teaspoons of vanilla
4 eggs
1 1/4 cups of all-purpose flour
1/2 teaspoon of baking powder
1/4 teaspoons of salt
1/4 cups of unsweetened cocoa powder
Directions: 
1.) Preheat the oven to 350 degrees. Grease 13x9 inch baking pan.
2.) Beat butter and peanut butter in a large bowl until well blended.
3.) Add in sugar and vanilla; beat until well blended.
4.) Add in eggs, beat until well blended.
5.) Stir in flour, baking powder and salt until just blended.
6.) Reserve 1 3/4 cups of batter.
7.) Stir cocoa into remaining batter.
8.) Spread cocoa batter evenly into prepared pan. Top with reserved batter. Bake for 30 minutes or under the edges pull away from sides of pan.
Notes: While the recipe advises to reserve 1 3/4 cups of the batter before adding in the cocoa, I found that it wasn't quite enough to top the brownies completely. Also, I think that 30 minutes might be just a little too long to bake them, so next time, I'll probably try closer to 25 minutes.


In completely unrelated news, my town is currently getting slammed by the "winter wallop" (isn't that a funny name? I've been cracking up all night over that) and I'm not quite sure how I'm going to get the Pony out of the parking lot tomorrow morning.


I took this picture last night before it really started coming down
To all my readers also being hit with snow, stay warm and safe! And I hope you stocked up on plenty of bread, toilet paper, eggs and milk!

Thursday, December 17, 2009

New Recipe Thursday: Intense Mint Chocolate Brownies

Okay, so, since I've pretty much been MIA since the freakin' beginning of December, I figured that I would go ahead and post a new recipe this week. I actually made these for my guinea pigs officers for last night, but after getting such a good response to them, I made another batch for KW (Hi KW) to take her to her little boy's Christmas program tonight.

Intense Mint Chocolate Brownies
Ingredients:
Brownies:
1 cup of butter
4 squares (1 ounce each) of unsweetened chocolate
1 1/2 cups of granulated sugar
3 eggs
1/2 teaspoon of salt
1/2 teaspoon mint extract
1/2 teaspoon of vanilla
3/4 cups of all-purpose flour
Mint Frosting
6 tablespoons of butter, softened
1/2 teaspoon of mint extract
2 to 3 drops of green food coloring
2 cups of powdered sugar
2 to 3 tablespoons of milk
Chocolate Glaze
1/3 cups of semisweet chocolate chips
2 tablespoons of butter
Directions:
Brownies: 
1.) Preheat oven to 325 degrees. Grease and flour 9-inch square baking pan.
2.) Melt the butter and chocolate in top of a double boiler over simmering water. Remove from heat.
3.) Beat in granulated sugar, eggs, salt, mint extract and vanilla until well blended.
4.) Stir in flour.
5.) Spread batter in prepared pan, bake for 35 minutes or until the top is firm and the edges begin to pull away from the sides of the pan.
6.) Cool completely.
Mint Frosting:
1.) Beat butter, mint extract and food coloring in a large bowl with with an electric mixer at medium speed until fluffy.
2.) Add in powdered sugar 1/2 cup at a time, beating well after each addition.
3.) Beat in milk, one tablespoon at a time until spreading consistency is reached.
4.) Spread frosting over cooled brownies.
Chocolate Glaze:
1.) Place chocolate chips and butter in a microwavable bowl.
2.) Microwave on LOW, 1 minute. Stir.
3.) Repeat until chocolate chips are melted and mixture is smooth.
4.) Drizzle glaze over frosting.
5.) Let stand for 30 minutes or until glaze is set.
Notes: When I first read this recipe, I misread it and thought that it said to use 'peppermint extract', so that's what I used. It really doesn't matter though. After googling, I found out that the mint extract would have given it a spearmint taste, while the peppermint extract gave it a candy cane flavor. Also, the first batch I made, I used the 9x9 pan, but for the second batch for KW, I used a 9x13 pan and baked for 30 minutes.


These brownies had a very good taste to them. The only problem I had was that my mom was impatient as hell and because of that, I frosted the brownies before they were completely cool. That's why there's a slightly runny consistency to the frosting in these pictures. 

Tuesday, December 15, 2009

New Recipe Tuesday: Melt In Your Mouth Christmas Marbles

As previously stated: no I am not dead. I had to take a break from blogging for a little while thanks to not having regular access to a computer, but rest assure: I am back.

Tonight, I thought I’d give a little video blogging a shot but unfortunately, when I uploaded it to youtube, it looked like an old King Kong movie because my mouth was not much up with the words. So maybe I'll try another time. 
Melt In Your Mouth Christmas Marbles

Ingredients:
1/2 cup of butter, softened
6 tablespoons of powdered sugar
1/4 teaspoons of vanilla
1 cup, minus 2 tablespoons of flour
1/4 teaspoon of salt
Red and Green food coloring
Directions:
1.)
Preheat the oven to 350 degrees.
2.) Beat butter and powdered sugar in a large bowl with an electric mixer until light and fluffy.
3.) Beat in vanilla until well blended.
4.) Gradually add in flour and salt, beating well after each addition.
5.) Transfer half the dough to another bowl, add red food coloring.
6.) Add in green food coloring to the other bowl, mixing well.
7.) For each marble, shape 1/2 teaspoonful of each color dough into one ball.
8.) Place one inch apart on prepared cookie sheet.
9.) Bake for 12-14 minutes, until edges are lightly browned.
Notes: The recipe says to use food coloring paste, though I don’t have that so I used regular color. The colors may have been more vibrant/better mixed if I’d used paste, so next time, I’ll try that. 


Thursday, December 3, 2009

I Need Your Help!

I know I've posted about this before, but I really need some new recipes! With Christmas quickly approaching, I've decided I'm giving out boxes of sweets as presents, but I don't know exactly what to make! I want to know what your favorite Christmas treats are. Even if you don't have an actual recipe, give me an idea of what I should look for! Credit will be given for all recipes!

Saturday, November 28, 2009

New Recipe Saturday: Fudgy Peanut Brownie Bites

Again, I'm well aware that this is not Tuesday, but after going through my cabinets last night and cleaning them out, I found quite a few ingredients that I wanted to use up. Besides, what better way to spend the Saturday after Thanksgiving then baking and putting up a Christmas tree?

Ziva, hoping I'm going to drop some peanut butter

Fudgy Peanut Brownie Bites
Ingredients:
Crust
1/4 cups of butter, softened
1/4 cups of creamy peanut butter
3 ounces of cream cheese, softened
1 cup of all-purpose flower
Filling
4 ounces of semi-sweet chocolate, chopped
2 tablespoons of butter
1 egg, slightly beaten
1/4 cups of sugar
1 teaspoon of vanilla
1/4 cups of chopped nuts
Directions:
Crust
1.) Preheat the oven to 325 degrees.
2.) Grease muffin tins, set aside.
3.) In a medium mixing bowl, beat the 1/4 cup of butter, peanut butter and cream cheese with an electric mixer until combined.
4.) Beat in flour on low speed until just combined.
5.) Shape dough into 1 inch balls.
6.) Press the balls evenly into the bottom and up the sides of the prepared muffin cups.
Filling
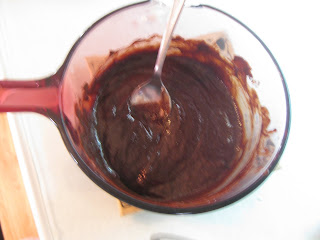
1.) In a small saucepan, heat and stir the chocolate and the 2 tablespoons of butter over a low heat, just until melted.
2.) Remove from heat.
3.) Stir in sugar, egg and vanilla until well combined.
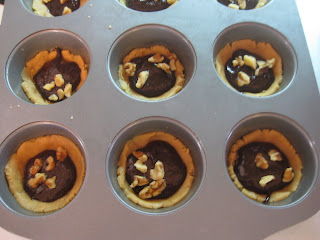
4.) Divide chocolate filling among muffin cups.
5.) Top each with chopped nuts.
Baking
1.) Baking the tarts for 25-30 minutes or until crust is golden and filling is puffed.
2.) Cool in muffin cups on a wire rack for 5 minutes. 
3.) Carefully remove tarts from muffin cups and cool completely on wire rack.
Notes: The recipe indicates that this will make 24 tarts, but I found that to be incorrect. It is possible, of course, that they're using a smaller muffin tin than I am. I made the mistake of not putting enough crust mixture in the bottom of the tins, trying to stretch the batter to make 24 tarts and because of that, I have super small tarts. Also, don't be concerned about the mixture being super crumbly after you add in the flour. It's supposed to be that way. Though these include peanut butter, I found that it was hard to taste, so if you're expecting something with a heavy peanut butter taste, you should probably add more than the recipe calls for.


I will admit that I was a little disappointed with the outcome of these. The filling part is absolutely delicious but I was expecting more a peanut butter taste. I most likely won't make these again.

Thursday, November 26, 2009

New Recipe Thursday: Red Velvet Cake


 Me, on any random night

It's not Tuesday and it's not even really a new recipe, but being that today was Thanksgiving, I decided to do a little baking for the family, as the majority of my lovely desserts go to the police department. So, last night, I sat up despite being ridiculously tired and baked, though I must admit it was well worth it.

Red Velvet Cake
Ingredients:
2 1/2 cups of cake flour
1/2 teaspoon of salt
2 tablespoons of cocoa powder
1/2 cup of butter
1 1/2 cups of sugar
2 large eggs
1 teaspoon of vanilla extract
1 cup of buttermilk
2 tablespoons of red food coloring
1 teaspoon of white vinegar
1 teaspoon of baking soda
Frosting
 16 ounces cream cheese, softened
1/2 cup of butter
1 teaspoon vanilla extract
2 1/2 cups of powdered sugar
Directions:
1.) Heat the oven to 350 degrees.
2.) Grease two 9 inch pans and line with parchment paper.
3.) In a medium bowl, sift flour, salt and cocoa powder.
4.) In a large mixing bowl, beat the butter and sugar until light and fluffy.
5.) Add eggs, one at a time.
6.) Add vanilla extract and beat until combined.
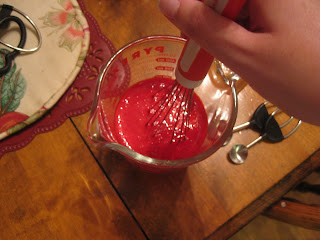
7.) In a measuring cup, whisk the buttermilk and food coloring.
8.) Alternately add flour and buttermilk to butter mixture, starting and ending with the flour.
9.) In a small cup, mix vinegar and baking soda. Allow to fizz, the fold into the batter.
10.) Bake for 25-30 minutes, then remove from oven and allow to cool.
Frosting:
1.) In a large bowl, mix cream cheese and butter until light and fluffy.
2.) Add in vanilla extract, mix well.
3.) Add in powdered sugar and beat until smooth.
Notes: This is essentially the same recipe that I used for the cupcakes. The main difference, that I can see, is that here, the food coloring is mixed in with the buttermilk. Also, though the recipe states to bake for 25-390 minutes, I found that 20 was sufficient for me.


Thursday, November 19, 2009

New Recipe... Thursday?

So, I'm pretty positive that I have the best mom in the world. No, really. As the the holidays are quickly approaching, this woman bought me all kinds of good stuff to bake with so I have all my ingredients ready to go when the urge to bake hits me. Kind of like today.

On Tuesday, I made Peppermint Bark, mainly because I had such cool candy boxes I wanted to try out, but I don't think that really counts as baking because I just threw it in the microwave. My best friend for life times three million (Hi KW) requested that I bake some cookies, and after scouring the internet, I finally found a chocolate chip cookie recipe that I like.

And the funniest thing? I already had it at home, on the back of my Toll House chocolate chips.

Original Nestle Toll House Chocolate Chip Cookies
Ingredients:
2 1/4 cups of all-purpose flour
1 teaspoon baking soda
1 teaspoon salt
1 cup of butter, softened
3/4 cups of granulated sugar
3/4 cups of packing brown sugar
1 teaspoon vanilla extract
2 large eggs
2 cups (12 oz package) of semi-sweet chocolate morsels
1 cup of chopped nuts.
Directions:
1.) Preheat oven to 375 degrees.
2.) Combine flour, baking soda and salt in a small bowl; set aside.
3.) Beat butter, sugars and vanilla together in a large bowl until creamy.
4.) Add eggs one at a time, beating well after each addition.
5.) Gradually beat in flour mixture.
6.) Stir in morsels and nuts.
7.) Drop by rounded tablespoons onto an ungreased baking sheet.
8.) Bake for 9-11 minutes or until golden brown.
Notes: First of all, I omitted the nuts. Usually, when I bake for KW (Hi KW), I like to send some home for her boys and one of them is allergic to nuts. Another thing I changed about this recipe is instead of using chocolate chips, I used the chunks. I'm a big fan of chocolate in my cookies and the chunks make them absolutely to die for. Except not really, because I don't think I'd ever willingly die for a cookie. The last thing I wanted to note, which is something I've been forgetting, is that sometimes I have a hard time baking my cookies all the way through. One side of the pan will be perfect while the other isn't even done all the way. To remedy this, I've started turning my pan halfway through the bake time to ensure that both sides get done at the same time. Also! This recipe advises that you can get about sixty cookies out of the batter, but I only managed 36.


Though I'm not really a huge fan of actually eating desserts (most of the time I don't even taste what I bake), I had to have two of these bad boys because they're just so damn good. I guess we'll find out what the guinea pigs officers think a little later.